Tuesday, July 6, 2021

that time I worked as an itinerant carpenter

 For the past couple of months I worked for my friend https://spacecraftcarpentry.com/ as an assistant carpenter. I was lucky enough to be part of a few interesting projects. I learned a ton and (the more you know) I learned how much there was left to learn: basically that there's still an entire world of knowledge to explore where fine cabinetry and finish carpentry is concerned. 

And since these are someone else's projects, I will state plainly that while I had a hand in the fabrication, I don't own rights or lay claim to any of this work. 


First day at work, I started helping with this install. The original cabinet is on the right, the new one -fabricated to match- on the left. Open it up and it's a boot rack. Check out the scribing on the back!!! Talk about nerve-wracking!

 
Most of my time, though, was spent fabricating the doors below: 
 
We were given some old fence wood, which we milled down into thick veneers and stiles for the core.
 
 Here's a pic of a side's worth of veneers: 


And a core glue-up. Note the weathered face on the stiles and the poplar rails
 
 
And here's where the magic happens: we milled the veneers to size, made camouflaged repairs as necessary, glued both sides, and used a vacuum bag to clamp everything in place.


They came out looking perfect!
 

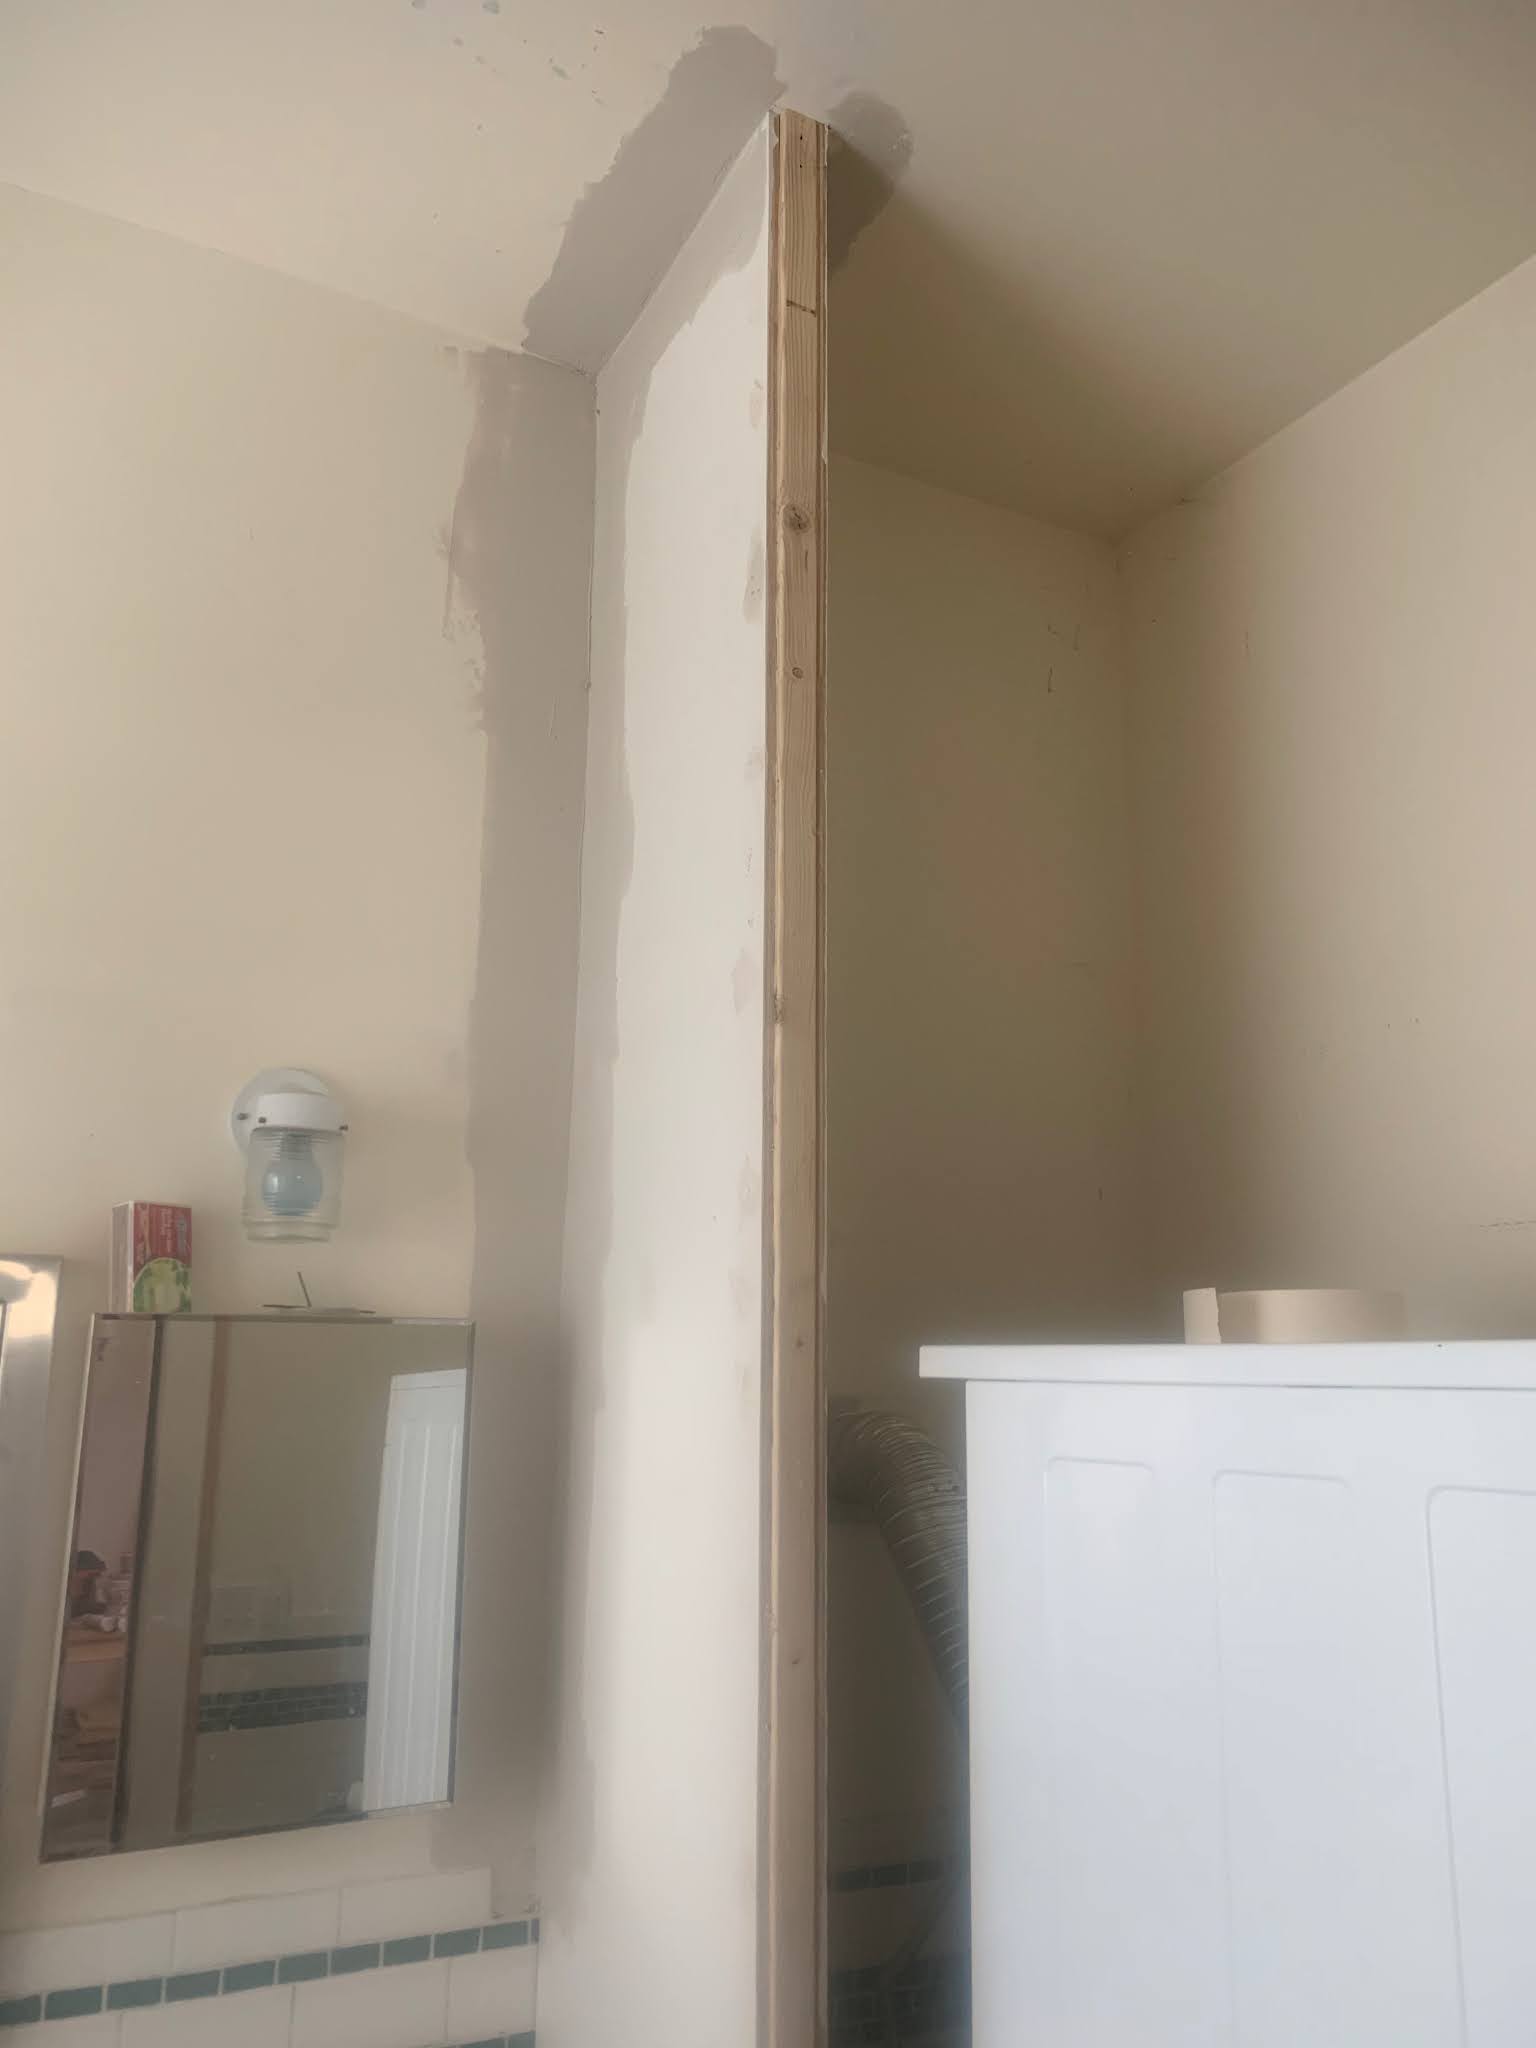
The last project I got a taste of was a site-built utility closet. This is definitely classier than the one I just built for myself. While it's built in a more exacting way, I was surprised at how similar our solutions were for making and anchoring slim walls.

It was a fun trip. Jaunts to Yellowstone and the Bear Tooth Range were among the extracurricular highlights. I learned a ton and got to catch up with an old friend. If you're in need of some custom cabinetry or finish carpentry and you're in the Bozeman area, I'd definitely recommend you seek out space/craft. Gabriel not only does excellent work, he's a gentleman and a scholar.

The next post will likely be the Seattle kitchen remodel I'm starting this week.


The utility room remodel

 After the welding, I got into putting the finishing touches on the utility room. The washer/dryer and the salvaged cabinet weren't exactly in the most efficient arrangement. So I made some improvements to those and installed nicer tub hardware.

The partition was framed using pocket screws and 2x4s on the flat side, sheathed in cabinet grade plywood. I left an opening for cleanout access. Here's the inside view:
For stability, I anchored an angle iron bracket to the floor and notched out the framing with a router. The top was toenailed into the truss above and the side was "glued" to the wall with expanding foam. This made for a really secure fit.
 Here it is in place and mudded
...Trimmed and primed...
Here's the cabinet I got at the ReStore, boxed in
And here they are all painted and tiled
 
 
Ideally there would've been space enough to box in the whole washer/dryer, but the floor plan would only allow for this much wall unless I wanted to remove the toilet whenever this needed work. I think this looks pretty good as is, though.

Definitely a step up from the economy clawfoot tub hardware

And here it is in action, utility sink and all
 (the ironing board soon found a home hanging on the wall)

After I finished this, I headed to Montana for a crash course in fine cabinetry and millwork. More on that in the next post!


A small welding project

This is most of the pandemic storage stuff. I'm currently without my bigger photo archive, so the suspended steel framed shelf will have to be added in later. The other stuff was interesting to make, too. Here it is.

I made a couple variations on this to get my storage cabinets off the ground and put bulky items underneath. The extra lip is for clearance behind the cabinet: either for storage or for light switch access.

The one below needed clearance underneath for the contractor saw, so the end is framed in steel bar, rather than angle iron.
This one was a little more straightforward

They only freed up about 12 square feet of floor space, but it's amazing how much clutter that actually eliminates.


The COVID stuff : finding use for salvaged materials

 Even though I worked onsite full-time through the pandemic, I found some time to experiment with some furniture and build in some storage. The furniture was all made using salvaged materials. I think a lot of people found that their spaces could use an upgrade and a purge during the pandemic. I did a little bit of both:


I made this chicken coop for a friend's flock out of the old siding and other scraps. I did use new lumber for the overall frame, but all the cladding is salvaged from one thing or another.

Made a little outdoor mounted box for my gardening hand tools as well.

And I made this rustic sleeper sofa. The slab of foam was already on hand, somewhat dictating the proportions of the thing. I laminated two halves of a sheet of ADX together and routered out slots and openings for the webbed backing. It's probably obvious that the base is made of pallets and the frame for the back is 2x4 lumber. 

Those are the early pandemic projects. The storage stuff is next.


Saturday, November 2, 2019

a commission


A couple friends reached out to me wanting a custom piece, so I took a few hours and came up with a bunch of designs. A few made it to the modeling phase:
So now we get to nail down materials and finishes and get started. It'll be nice to make a custom piece for someone else again. It's been a while.
 
Update 7/6/21:
This one never made it beyond the drawing board for various reasons. I did end up making a simple countertop for one member of the couple, thanks to work-from-home becoming the standard in early 2020. Here's a  couple pics of that:


Monday, August 19, 2019

More Homesteading

The final part of this voluminous data-dump is the remodel of the front house. The place had a wonky foundation. It had been sitting on cedar posts for 90 years or so, and those had long ago rotted below ground level. The utility room was also an impractical little eyesore that felt like a cramped sauna. Not exactly the place I want to do laundry. And, in my opinion, the place kind of needed another bathroom and a covered porch. So that's what I built.

Here's the demo:
I salvaged as much of the old wood siding and framing as I could. Had to bag and dump all the asbestos that was on the back. After that, the foundation crew came in and leveled the place and poured piers for the addition. That's not very exciting to look at.

Here it is all framed and sheathed. You can see a little bit of the salvaged siding at the bottom there. Sanding and painting all that stuff wasn't my favorite thing to do.
But I did it.
And wired it. And ran vents. I did not plumb it, roof it, frame it, sheathe it, or insulate it. I left that to the pros. I did drywall, float, paint, tile, and cuss it.

The porch got lights and a fan. It's a nice spot: a square, shaded space with an open view of the garden.

The inside is actually a little tight for good photos, but here's what I snapped before the tenants moved in:

The mud room (utility sink, medicine cabinet). the occasional white tiles in the floor make a map of part of the night sky in the northern hemisphere. Yes, I'm a dork.
And the bathroom. The tub is refinished. Epoxy on the inside and I sealed the outside with a shellac that I dyed to look kind of like oxidized copper.
This is taken from where the washer/dryer is. Again, a little narrow, but the ceilings in there are 12 feet tall. It doesn't feel cramped.

A few other things happened outside, as well:

Laundry-to-landscape plumbing.
Divided the shipping container by getting the welders to move one of the doors to the back and part of the back wall to the front. Then I framed a wall inside. Viola.


And it was a good year in the perennial garden, as well. Tons of monarchs and tons of fruit so far, except the nectarines and peaches. Those are recovering from last year.

But yeah. I built some stuff and the city said it was OK.


And once I felt better, I felt compelled to work on yet another construction project

So after recuperating from the ER, I made a bucket list. I've been chipping away at it fairly steadily. I could stand to accelerate my progress a little bit, but that's another story. The point of this post is that the necessity for this next project came into focus, so being the determined guy that I am, I saved up, worked on a small project for my own humble abode (honestly, this was in the works while I was still at the Witte), and then went ahead with the planning, permitting, and construction.

First the interior design stuff in my place:

Poplar "butcher block" type slabs that I laminated together with biscuits and dowels, Piano hinge, and some mahogany table legs that I found for cheap at a thrift store.  Like I've said before, I like having something pre-existing to work off of.
Oddly, at this stage the place seems both small and empty. I wanted the built-ins to feel built in, so I made that happen:
And I'm sure you can guess what's coming next:

I'm a little proud of that piece of handiwork. It's part cabin, part tiny home, part mid-century inspired bachelor pad. kinda.

It definitely made the space more functional and fun. Only took a few weekends and lunch breaks.

Next post is the remodel...